How to arrange a gallery wall before making holes
· Editorial team miaminewsjoe.com
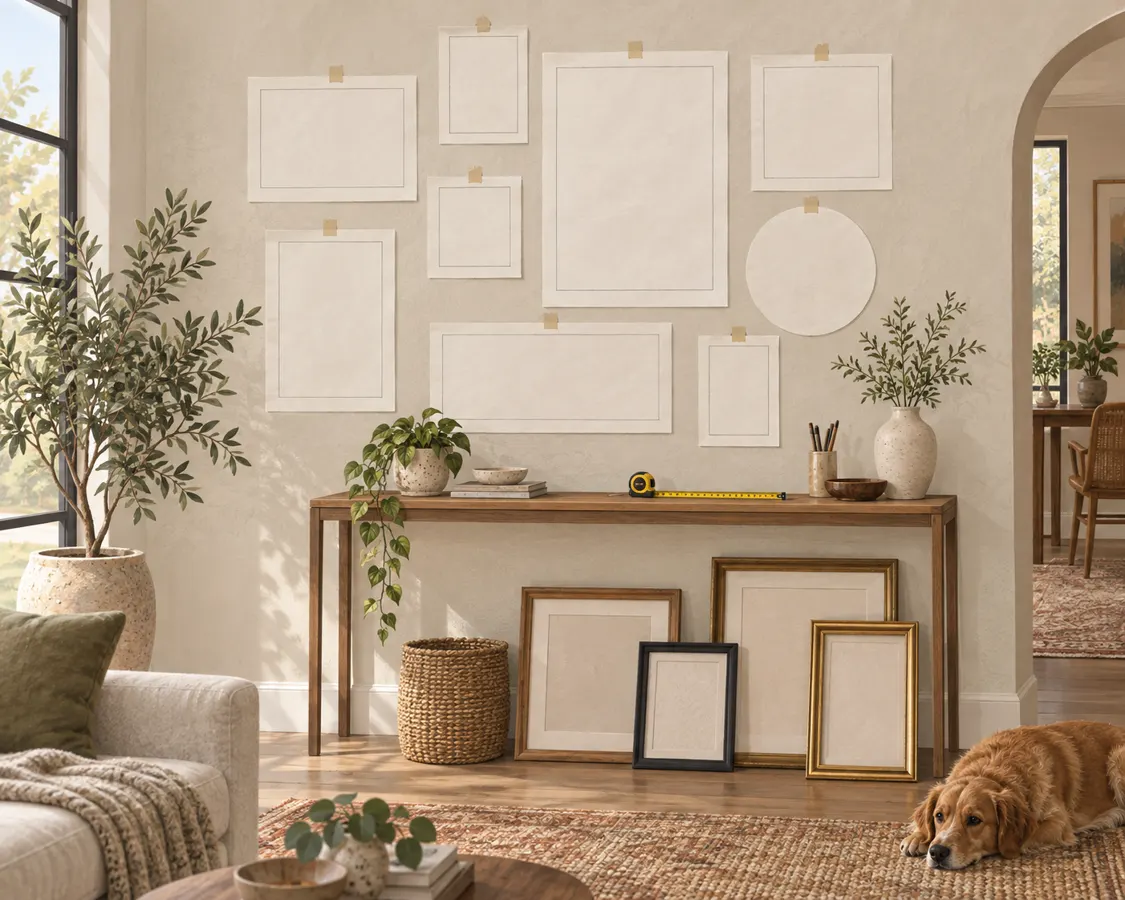
Cut paper templates to the outside dimensions of your frames, tape them to the wall, and adjust them until the arrangement looks balanced from across the room. This lets you check the full display before making holes. Once the layout is settled, use each frame’s actual hanging hardware to locate its fixing points.
Measure the space and gather your frames
Measure the usable wall area, taking furniture, door trim, windows, switches and vents into account. Above a sofa or console, consider the furniture and the gallery as one composition. A display roughly two-thirds the furniture’s width is a starting point suggested by one source, but adjust it to suit your pieces and room.
Gather the family photos and art prints you want to include. Measure each complete frame, including its outer edges; the print size alone will make your template too small. If you have not bought frames yet, use their listed outside dimensions and confirm those measurements before hanging.
- Paper large enough for each frame, or smaller sheets joined together
- A pencil, scissors and tape measure
- Removable painter’s tape suitable for your wall finish
- A level and a phone for reference photos
Choose a layout with a clear organizing line
Arrange the actual frames on the floor first. This shows how the pictures, mats and frame colors work together, which blank paper cannot tell you. Choose one shared feature, such as similar frame finishes or a repeated color in the images, to help the collection feel connected.
- A grid: use matching frame sizes with aligned rows and columns.
- A shared centerline: place different-size frames so their centers follow one horizontal line.
- An anchor arrangement: begin with a larger picture and position smaller pieces around it.
For a mixed-size collection, our editorial proposal is to choose one main alignment first, then allow a few frames to vary around it. This gives you a clear reference when deciding whether a small picture belongs higher, lower or elsewhere.
Make and position full-size paper templates
- Trace each frame onto paper or draw a rectangle using its outside measurements, then cut it out.
- Label every template with the picture it represents and indicate its upright orientation.
- Tape the largest or central template in place first, using your floor arrangement as a guide.
- Add the remaining templates, measuring the gaps between their edges.
- Use a level to check the horizontal edges and any shared alignment lines.
A gap of 2–3 inches is a common starting point. Try one spacing across the arrangement before introducing variations. Measure edge to edge, rather than between frame centers, especially when the frames differ in size. If the display feels crowded, increase the gaps or remove a piece and reassess.
Check the balance from where you use the room
Step back to see the entire arrangement, then look from the doorway and your usual seat. Check whether the group feels centered over the furniture and whether one side appears crowded. Move the paper pieces individually instead of shifting everything whenever one corner feels awkward.
Keep a photo of the floor layout nearby while assessing the templates: a dark photograph or bold print may draw more attention than another piece of the same size. Our editorial proposal is to swap a visually strong image with a quieter one when the shapes look balanced but the actual artwork does not.
Leave the templates up for a day or two if possible. The often-mentioned 57-inch guideline refers to the center of an arrangement measured from the floor. Treat it as a reference, adjusting for furniture and the room rather than forcing every individual frame to that height.
Mark the hanging points before removing the paper
A frame’s top edge is not necessarily where its wall fixing belongs. Once you approve the layout, inspect the back of each frame and transfer the actual hanger positions to its template. For a two-point hanger, mark both positions and check that they are level. Confirm the marks against the frame before making holes.
Photograph the final template arrangement and keep the paper in place as you work. Start with the central or anchor piece, then work outward, checking spacing and level as each frame goes up. Choose fixings appropriate to the frame and wall. If using adhesive hanging products, follow their specified surface requirements, weight limits and application instructions.