A two-zone entryway setup for wet shoes and beach gear
· Editorial team miaminewsjoe.com
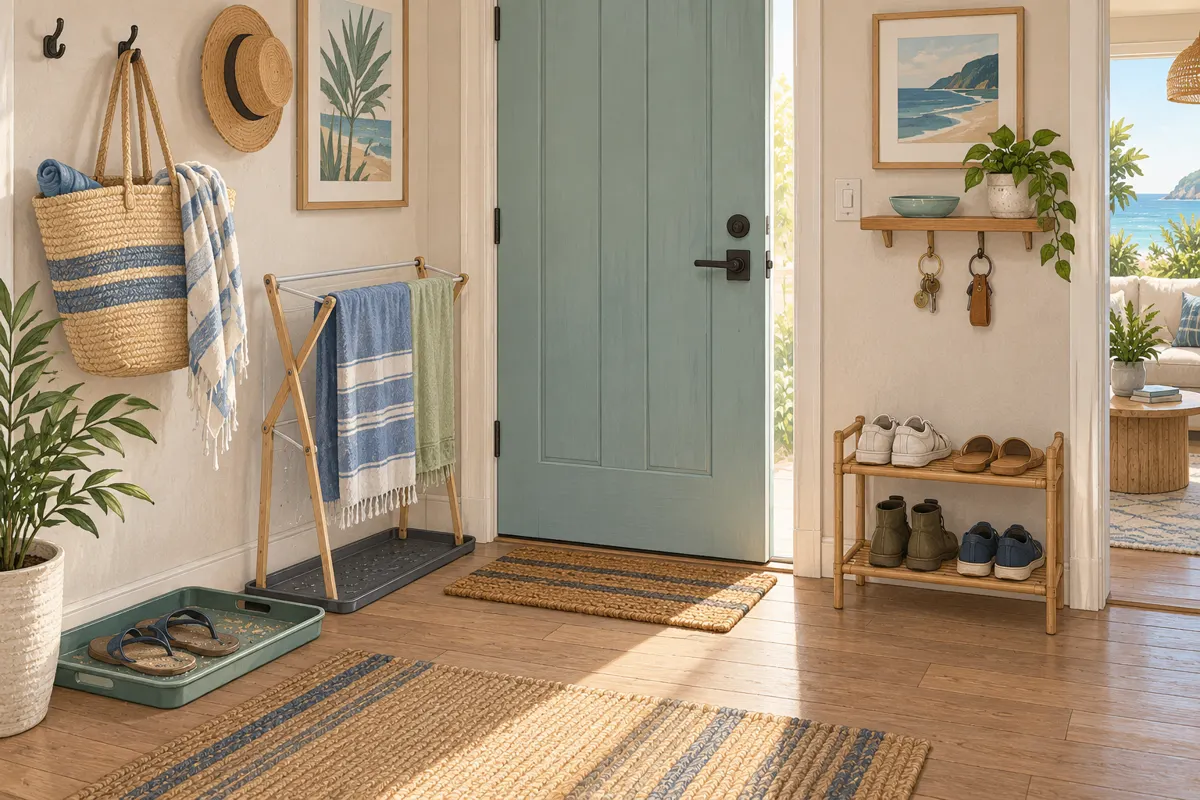
Keep wet shoes and beach gear on a washable tray near the door, and give dry everyday items a separate shelf, hook or shoe rack beyond it. For a small apartment without a mudroom, we propose this two-zone setup: one spot to catch damp arrivals, another to hold things ready to use. Add a compact drying place so wet gear has somewhere to go next.
Lay out the two zones around your doorway
Start by opening the door fully and walking through the entryway carrying a bag. Use the space beside that route for storage. A tray that catches drips is only useful if you can reach it without blocking the door or stepping over shoes.
Our proposed layout puts a washable shoe tray beside the entrance, with a hook above it for a damp beach tote. Place a narrow rack or small shelf farther along the wall for dry shoes, keys and everyday bags. If you have only one usable wall, arrange these spots side by side and keep hanging wet items away from the dry shelf.
Compact racks, wall hooks and dedicated drop zones are established entryway storage options. Choose only the pieces that fit your route through the room; a bench is optional when floor space is tight.
Give wet shoes a washable landing spot
Use a tray with a raised edge that you can lift, empty and wash easily. Check its fit with the shoes you actually bring home, including sandals. Keep footwear inside the tray instead of letting pairs collect around its edges. Shoe trays help contain tracked-in dirt and simplify cleanup.
- Set damp shoes apart rather than stacking them.
- Keep a washable cloth nearby for wiping the tray and surrounding floor.
- Leave the tray accessible so cleaning does not require moving furniture.
- Move dry pairs to the dry zone to make room for the next arrival.
Treat the tray as temporary parking. If it regularly overflows, reduce the number of shoes stored at the entrance before adding another container.
Create a compact place for gear to dry
A hook can hold a beach bag off the floor, but a stuffed bag leaves its damp contents bundled together. On arrival, take out towels, swimwear and other wet items. Our proposal is to use the entryway for unloading and a small rack over a washable drip-catching surface for drying.
If a rack would obstruct the entrance, use an available drying spot elsewhere in the apartment. Spread items out according to their care instructions, and put them away once dry. Keep dripping fabric clear of walls, dry belongings and electrical outlets.
Choose hooks suited to the surface and the loaded bag’s weight. For a rental, check installation restrictions before attaching hardware. Keep the empty tote on its hook so it is easy to repack.
Keep the dry zone small and ready to use
Give keys and sunglasses one small dish or shelf, everyday bags their own hooks, and dry shoes a compact rack. These storage approaches keep frequently used belongings accessible without spreading them across the floor.
Our proposed limit is the footwear and bags currently in regular use. Store spare pairs and bulky beach supplies elsewhere. Keep a small bin for clean, dry beach accessories if space allows, but leave it out of the path beneath dripping gear. A simple boundary helps everyone know where things belong.
Use a five-minute reset after arriving home
This proposed routine resets the space; drying and laundry will take longer. Work through it after a beach trip or rainy arrival.
- First minute: put damp shoes in the tray and keys in the dry drop spot.
- Second minute: empty the beach bag and move wet fabric to its drying place.
- Third minute: remove loose sand and debris from gear where you can collect and dispose of it easily.
- Fourth minute: empty any collected water, wipe the tray and dry wet patches on the floor.
- Fifth minute: return dry items to storage and check that the door and walking route are clear.
Later, put away the dried gear. That final transfer keeps tomorrow’s wet landing spot available.